15 January 2014

Still working...

The Brother NV 200 has proven (so far, touch wood) to be very reliable. I use my machines in special tables with the machine set down and plastic inserts to make the surface flat. I have the inserts for the Janome and Bernina which is on its way to Rhode Island where I may end up getting a new machine. The motor WAS burned out and there may be damage to the "too tight" fly wheel.
Meanwhile the Brother NV 200 is sitting in a hole and it it is almost impossible to move the fabric.

Mother being the necessity of invention and me being a mother came up with this idea.


This is a piece of foam core board being held in place by three strips of packing tape. Three of the edges are resting on the lip of the cut-out and are pretty stable.


I can easily slide my hand across the foam core board getting just the support to keep the fabric out of the hole!!


The hero of the day, my 11 year old Brother NV 200.


Strip two finished.

13 January 2014

From bad to worse

I decided to use the brand new Bernina I bought this summer because it is totally mechanical ( no computer parts). After two hours the motor burned up. NO KIDDING. I bought this in RI but I can take it to Bangor (an hour away) and they have to honor the 2 year motor guarantee.
Meanwhile I will fire up the LAST machine I have which is a Brother NV 200, a very reliable machine I originally bought as a light weight machine to take to classes AND a back-up machine. It's turned out to be a lifesaver and very reliable. I'll still try the 40 wt thread which is no problem with straight stitching on any machine. For some reason the free motion just doesn't like it.

Meanwhile a few pics of strip 2.


Another update. Get ready to laugh. First story on the local news last night was about the Bangor Bernina dealer whose roof collapsed under the weight of ice and rain with a total loss. Looks like my burned up baby is headed off to RI via Fedex...

10 January 2014

Second Strip and thread breaking update

Actually lots to talk about today. I switched machines yesterday when suddenly... Yes, Everyone was having fun til someone put an eye out. One of my favorite expressions for OH NO!!
I started to have the same breakage problems with the Brother. I won't go into all the work I continued to do with the Janome but I think it might be a case of similar (and not very function free motion feet) and 10 year old rayon. As a natural tree product, I can believe that the rayon might be breaking down but who knows. I went back to a straight stitch foot on the Janome feed dogs up and it seems to be back to normal.

I was doing some cross hatching on the Signature image block, my first, when the Brother went bonkers. I ended up with some kind of regular thread in the bobbin, chosen at random, and another Superior thread weight 40 instead of 60. I was able to finish the cross hatching.


Lots of boo-boos and ripping of stitching so I'm aiming this end of the quilt for a side or bottom edge - in other words out of sight - smile.

Now for something very important. Some of these filler designs I made up but many were borrow or inspired by Leah Day and her amazing free motion quilting site. I HAVE supported her with money in the past and as a matter of fact, I gave away two of her DVD's and a book of printed filler designs last year I think.

I also made a similar quilt four years ago called "20 Moons" for my grandson. Some of these designs were mine and a few Leah Day's.

I also want to mention that on small pieces that I am free motioning, I may or may not use finger cots (rubber fingers). I have also used the cut tips off rubber gloves and those rubber money counter finger tips. This 6 foot strip is still pretty heavy expecially with the extra 7 inches of batting for the sash. I have purchased those white tacky gloves but they really didn't work for me. I found these men's work gloves in a odd lot store for cheap and I am using them. You can see the web of tacky on the palm side. I guess these are to grip tools. Whatever, I like them.


OK, now on to the next strip. I cut the batting at 13". After thought? Should have made it 14" for my comfort - mentally.


When I opened up the large piece of snow dyes I am using for backing, the seam just fell at 13". Still will do 14" next time. I snipped at the center seam and tore. Who would have ever suspected that tearing these 18" strips before dyeing would facilitate the assembly and use of the fabric in the future.

I later tore off the seam and the piece below is my new backing strip


Sandwiched and pinned and ready to go.


08 January 2014

Free motion begins

Now this looks better. Backing cut and pinned in place.


I thought I might use these cool clips to hold back the other circles in the strip. It was a brilliant idea but I ended up losing them after a while.

On DMTV yesterday, Linda Kemshall really emphasized sampling and testing before starting a piece. I have had this half circle kicking around so I sandwiched it up with batting and an actual piece of the backing material. I needed to warm up my free motion as well and see how the colors looked on the actual circle.


The color is way off. A blizzard today has covered my skylights so I am working in artificial light - again! It is hard to see but I free motioned the purple in the Superior thread, periwinkle, that I used to assemble the quilt. It matched - almost too well. I used a nice olive rayon embroidery thread. I used this because I had it, the rayon looks good and is also a very thin thread.


This is the olive rayon thread.


I have been having CONSTANT problems with the thread catching and breaking and after repeated re-threading I finally gave up and changed machines.
This is a brand new Janome and I can't figure out why it won't sew.


Here is the first motif. I did the image in the periwinkle (fair) and the circles in a gold color. The gold is OK but not as nice as the olive. I will however use it again, I'm sure.


This was all done in olive and I like it. You can also see a bit of the purple  sewn in a meander like vermicelli. Of course the second circle will always look better because of practice. I am enjoying the time I am taking and just the process of actually sewing and enjoying myself after so long. Very satisfying!


Last 2 circles of the day 


 Two green and one gold thread I am using.


I just finished the last 2 blocks so now I am finished the the first strip.


06 January 2014

A few things and on with the quilt

I got a good deal on these heavy weight white 100% 
wool blankets but when I opened the box they weighed a ton. They have to be well over 5 pounds each. Now I am thinking a purse or a coat


This one was a bit lighter but still 3 to 4 times the weight and thickness of the one I used on the FIRE blog. I am not disappointed.


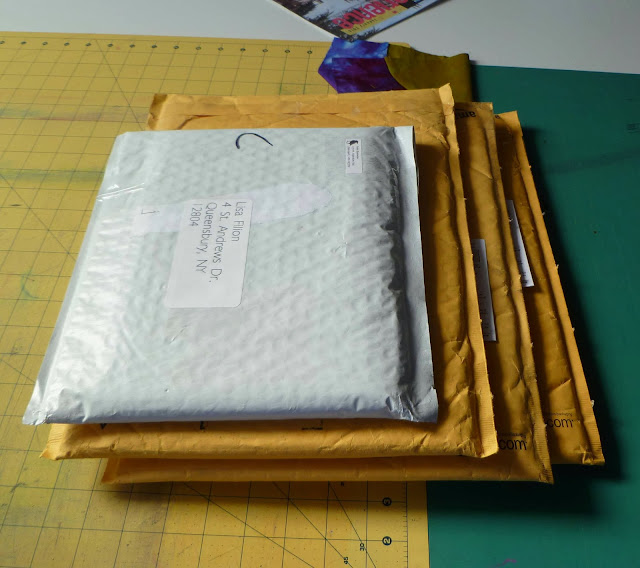
Here are the four books being mailed out tomorrow. You can see the white customs forms peeking out for the 2 going to the Netherlands and the one to New Zealand. I hope to get confirmation of arrival. I'd like to know they arrived safely!!


Another thing I was desperate to find were THIN silk pins, the longer the better. The pins on the right was the best. 2" long and sharp. I just emptied the trash and I can't remember the name

 I found my order

I had smoothed and pinned the strip in anticipation of the quilting today but do YOU see what's missing? Backing!


 I got out all that snow dye I had made last winter. Each piece was 18" X 45" so side seaming them gave me great 90" half yard long pieces


Here sits the last one which will bring my stitched backing to 90" X 135". 


This is what I have so far 6' X 90".


Tomorrow I WILL start the free motion!

03 January 2014

Been waiting for this day

One of the good things lying about like a zombie was plenty of time to work out the problems I created making this quilt like not having enough fabric!!


Another shot out of direct sun showing the lovely "surprise" marbling of the edging fabric. What a great save.

Another task was trying to keep the quilt top as whole as possible and not having to make so many QAYG (Quilt As You Go) seams. I figured I could handle a 1' X 6' strip and keep it straight. So the plan was to sandwich up the quilt, batting and backing and quilt the strip to within an inch, maybe 1 1/2 of the edges.
The batting by the yard is crazy - like $15-$17/yd. A few months ago Joann had the pre-cut queen batting 90" X 108 " on sale for half price. That's about 4 yards of batting. I forgot what I paid, maybe $22-$24. for the package. I bought 2. Next DAY it was on sale for 60% which was about $18. and I ordered 3. Probably won't see that for a while.


I laid out the batting and cut at the 90" width a slice 21".


This will give me about an inch at each side, and inch at the QAYG seam to the next 6' strip and 7" to do a flip and sew 2" green sash and another flip and sew 4" purple sash, at least top and bottom.


Below is what I have left of the queen bat. The length is the length and the width is 90" which is how I am cutting the strips.


It was a bit wrinkled so I cool pressed the bat a bit to get it as smooth as possible.


 This is what was left of the end of the 90" strip. I save these and zigzag them together for future needs. You can't even tell.

This is my Sewline BEST ever white marker. Expensive but worth every dollar. It last forever. I still have the original core inside.


Signature image.


 Smoothed to within a inch of it's life, pinned and ready to sew! Can't wait!!