First let me tell you that I am NO where near an expert in surface design. I DO know how various experiments I have tried have worked and I am willing to share them. I will start in the beginning with what I THINK I know. I will also include little side bits of info that I think are relevant marked with an asterisk(*) I will also try to answer all question in the comment box so everyone can see the answers (yeah, I was wondering that myself).
What exactly does deconstructed screen printing mean? To me, it means that I have constructed a screen with dyes applied in a textual way which I have allowed to dry onto the screen. Then I used a wetting agent to deconstruct the work (in dried dye) that I made, depositing the reconstituted dyes onto a substrate, which in this tutorial is cotton*.
* you can use any plant based fabric. You can also use silk if you limit the exposure to soda ash to the final step as I have laid out in these directions.
First I want to talk about “print paste”. Print paste is agar from seaweed which is also used in processed food and totally non-toxic. This is a link to the directions from the company that I buy my supplies from. MY directions are a bit different. I call them (my shortcuts) the quick and dirty approach. I use only THICH SH instead of "regular" SH since it thickens twice as well. You get more bang for your buck. If you want thinner viscosity print paste simply use less THICK SH.
- My directions for print paste:
- In a kitchen blender that you use ONLY for your art materials mix 2 tablespoons of THICK SH with one quart of cool/coldwater. I use no other chemicals just water. Blend on high speed.
- Look for a used blender at Goodwill or any second hand shop. You’ll thank me. Trust me when I tell you this is the BEST way to mix it
- Second best way is with a kitchen whisk.
- It takes about a half hour for the print paste to “set-up”. The print paste after a half hour "rest" before using should be as thick as honey
- Print paste will last over 6 months in the refrigerator. When it "goes bad" it smells like rotten sea weed or urine. ALSO thickened dye without soda ash will last a LONG time. I've used mine months later. Keep refrigerated.
**You will use print paste twice:
1. You will use it to make your thickened dye to apply to the screen WITHOUT soda ash
2. You will use it to wet and dissolve the dried thickened dye from the screens onto your fabric with soda ash.
1. You will use it to make your thickened dye to apply to the screen WITHOUT soda ash
2. You will use it to wet and dissolve the dried thickened dye from the screens onto your fabric with soda ash.
*Picture this. Soda ash is the catcher’s mitt and dye molecules are the balls. Don’t let those expensive dye molecules fly around without a bunch of catcher’s mitts to grab them. Err on the side of caution. Soda ash is cheap.
It is possible to prepare the fabric ahead of time with soda ash but I wouldn't recommend it. It is time consuming not worth the effort.
Setting up/Constructing your screens
I am VERY fortunate and have a large space in my kitchen to set up my printing table which is 4’ X 8’. Yes, it is a ½ sheet of plywood covered with carpet foam (stiff) and synthetic felt. I cover the entire thing with an ugly old flannel sheet which is absorbent and washable. I am mentioning this because I set up about 6 screens to “do” a 45” wide piece of cotton 8 feet long. You will need to arrange a spot to deconstruct. You might want to get a sheet of ½” plywood 2’ X 4’ and cover with batting and muslin like I made hereto be my ironing surface. This is very handy because being 48” wide gives me room for a 45” wide piece of fabric. Just a suggestion. However you DO need a printing surface. Prepare as many screens as you think you can handle.
Making the thickened dyes: My thickened dye is dark and I like it that way. Try it my way first. There is nothing as disappointing as “light” pastel prints. If you are afraid the dye is too dark you can add the dye to some clear print paste right in the well before you print. This is an example of the flexibility of dark dyes.
Recipe for thickened dyes: 1 cup print paste with one teaspoon of dye powder.(use a mask when handling dye powder)
*An added note. I try to use just enough and not too much dye to construct the screens. If you do use too much dye, make sure to get all the remaining dye out of wells or the dye will drip onto the screens below while drying. Drops and spots of dye can add interest to prints but know that they will act as resists until they start to break down and become interesting. I will try to point this out later on when we look at actual prints. Remember, there are NO mistakes, just interesting lessons.


Inside of screen - where you place and squeegee the dye


Place one, two or three colors in the well of your screen and pull the dye over the screen. When you feel you have the screen covered well with dye do a very firm pull leaving an even but NOT THICK layer of dye on the screen. First pull with these two colors. All I had in the refrigerator was a drop of orange, a drop of red, some yellow and some dark navy. Thought I'd use these up before making more.


Place the screens on a flat surface and use jar lids as spacers between screens. I have been saving jar lids for years *(optional).
Allow to dry – very dry. IF I use spacers these will be dry in the morning.
Allow to dry – very dry. IF I use spacers these will be dry in the morning.
I started out today with 6 dried screens. I set up 2 tables side by side. The table is 4' X 8'.
 Tables stored behind door
 Set up with not much moving around room
 With print table on top.
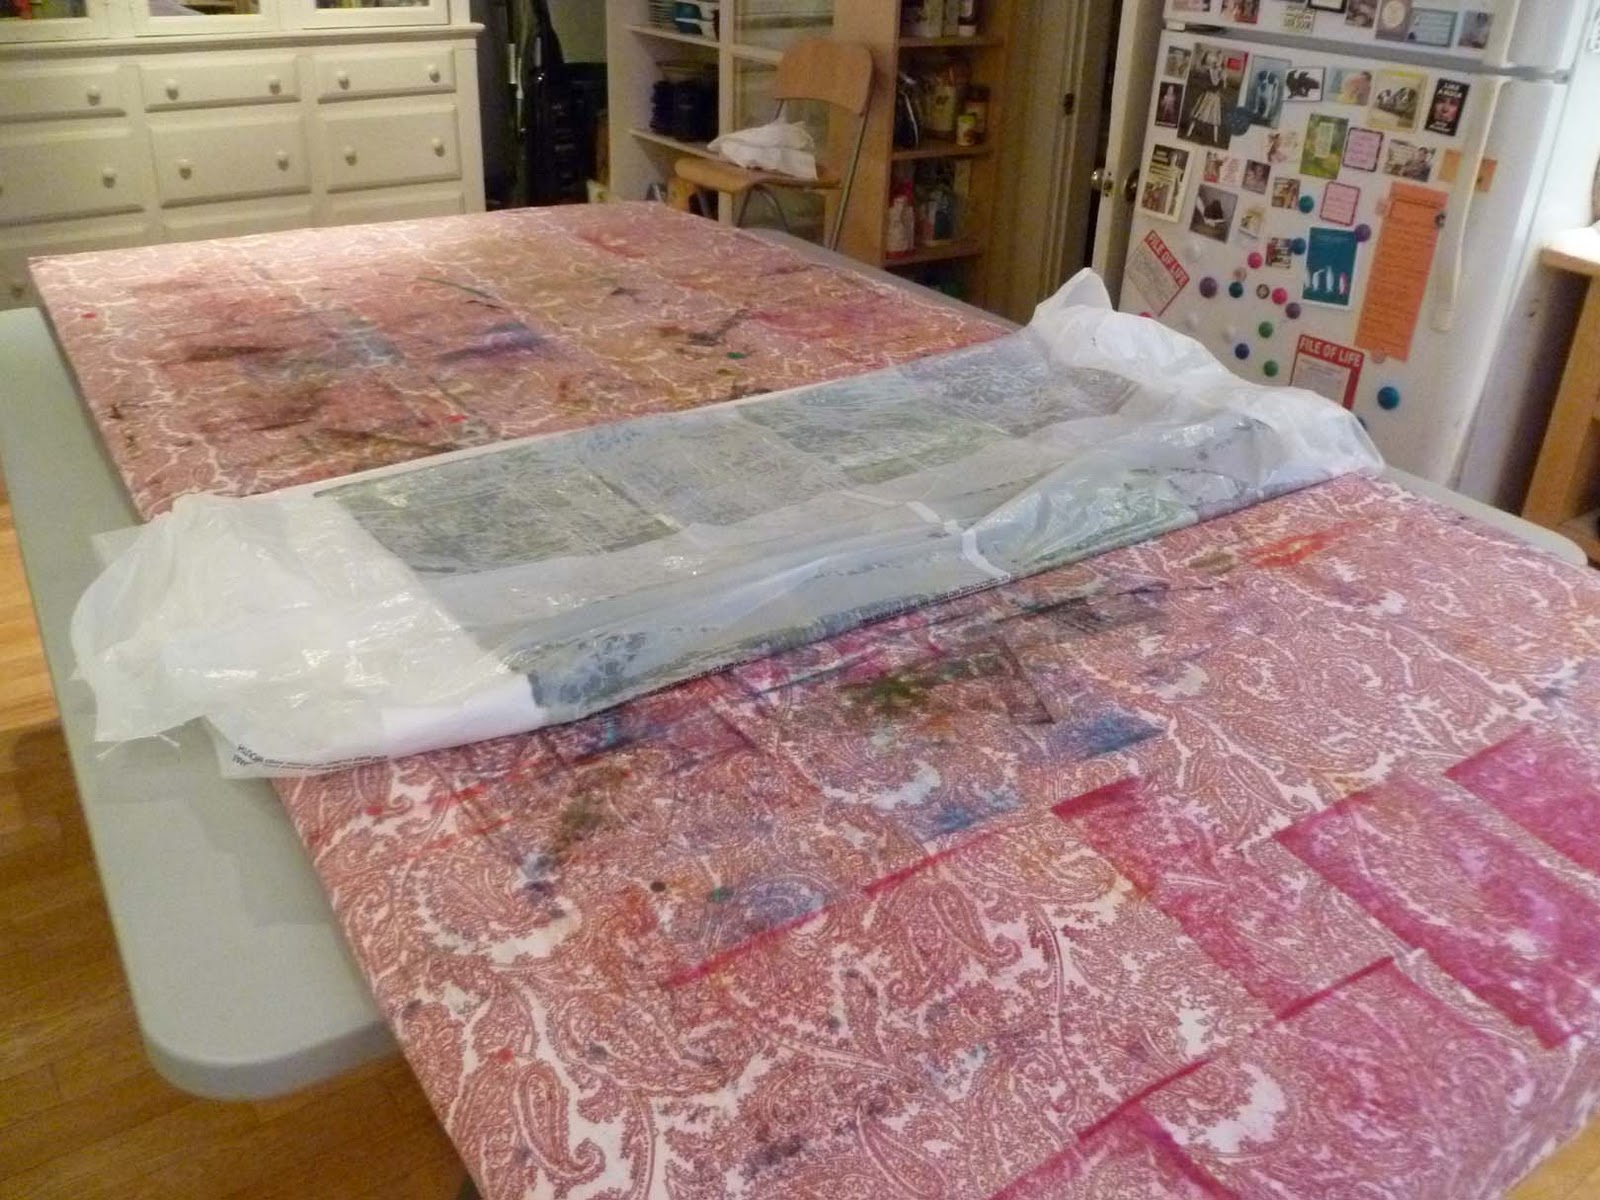
 With opened bin bags covering table. I found this was the easiest way to fold up the fabric to batch which you will see at the end of the printing session.

 I was almost out of print paste so I made 2 quarts (2000ml). That's 2 T.Thick SH /1 quart (1000ml) water.
 Thick SH in 1 lb. bag with blender

 I keep the lid on at all times to keep mold spores out. Print paste lasts a long time (over 6 months) but when it goes bad there is no question. It smells like rotting seaweed. REFRIGERATE IT.
Now make 1 cup of print paste with one Tablespoon of soda ash or double the recipe for 2 cups. This will do two things: 1.) wet and loosen the dried dye so it can be screened onto the fabric and 2.) add the soda ash to the dye so that the dye and attach to the fibers of the fabric and become permanent.
 The dark heavy deposits of dye will act as a resist. The lighter and see through area will be where the color melts (deconstructs) easiest and is then deposited on the cloth. As the screen is pulled over and over, more dye dissolves leaving larger areas with dye on the cloth and smaller areas of resist. That is due to the break down of the dried dye and it's deposition on the fabric.
 Initial wetting with a thick layer of clear print paste with soda ash in it.

 First few pulls. Lots of white because not much dye has broken down yet. From this picture you can really start to understand how the thickest dye that hasn't dissolved (deconstructed) yet acts as a resist.
 After 4 pulls (prints)
One of the cool things that I experimented with was to make 4 prints, then turn the screen up-side-down and print again over the four prints. If you look at the fabric with 2 prints above, that would mean I would turn the screen so that the red part of the screen was now on top and the blue on the bottom. This was my attempt to get rid of all the white.
 These are the four blocks above with one print and one reverse print. Still lots of white but you can see red and blue all over. One of the things I love about this type of surface design is the wonderful figuring on the cloth. I will point out more after the fabric is batched and washed.


 . The next thing I did was to take the squeegee with clear print paste and carefully pass it over the print. It picked up enough color to tint the white spots.
 I didn't want to mix the red screen and yellow screens so I used clear print paste directly on the squeegee without a screen and as you can see the white spots are now tinted without losing the definition. This is the power of the first strike. Once those catcher's mitts have balls in them they have a powerful bond. If you are relatively gentle with the clear print paste, you can add tint to the white without disturbing the original prints. This was Judith's idea. My idea was to place a blank screen on the print and just pull tinted print paste on the small area that was white. This also worked and was a bit faster. It also had the safety of having the screen between the printed fabric and the squeegee preventing any smears.
This another screen in process


 I forgot to get a picture of all the fabric covered. You will see it tomorrow after batching. This picture is after I tore off the last 2 feet of unprinted fabric. I took that last bin bag and placed it over the end of the fabric then folded it so that all wet sections were touching plastic. Four big folds below.


Some of these are close-up and some are pictures of two prints. I only made four prints of each screen. Sometimes you can make more but I'd rather have mine rich in color than numerous.


 This is a closeup of the drips. The thick drips of dried dye act as a resist but as they break down (deconstruct) they leave a halo or outline of their color. Can you see the navy outlines along the sides of these drips?
On the block below you can see a double image or ghost image. This happened ( many times) because I lifted he screen after the first pull, thought the image too weak so I lowered the screen back into place but it was just enough off to give the double image or ghost look.


 On the screens above, you can see the navy color around the drops or circles on both screens
 These last two were just fill-ins. I had run out of dye on the screens and just filled in the space with color. If I hadn't, I would have large blocks of white. This way I used some of the left over dye, covered the white and have something I can add more layers to with stamps, more dyeing or fabric paints.
 This was a very sad pale square although the drips and dots are kind of cute. A good first layer. The objects on the left are color catchers which grab loose dye molecules in the washing machine to prevent dye back or dye re-depositing on the fabric
Here are some fabulous deconstructed screen prints with those sad white blank spots. See the difference when you fill them in? Also with all the white filled in, 4 prints can read as one long piece of fabric.
.


Table with pre-treated fabric tightly T-pinned to the table


Now make 1 cup of print paste with one Tablespoon of soda ash or double the recipe for 2 cups. This will do two things: 1.) wet and loosen the dried dye so it can be screened onto the fabric and 2.) add the soda ash to the dye so that the dye and attach to the fibers of the fabric and become permanent.


One of the cool things that I experimented with was to make 4 prints, then turn the screen up-side-down and print again over the four prints. If you look at the fabric with 2 prints above, that would mean I would turn the screen so that the red part of the screen was now on top and the blue on the bottom. This was my attempt to get rid of all the white.


Folded neatly into a small packet to fit on my tray. A room that is at least 70 degrees is perfect for batching. Another method is to use rice bags heated in the microwave oven, placed on plastic covered fabric and covered with a towel. It works beautifully.
Next we will see the finished fabric and a comparison with some deconstructed pieces I did before filling in the white spots.
Here is the entire piece batched, washed and ironed

Some of these are close-up and some are pictures of two prints. I only made four prints of each screen. Sometimes you can make more but I'd rather have mine rich in color than numerous.


On the block below you can see a double image or ghost image. This happened ( many times) because I lifted he screen after the first pull, thought the image too weak so I lowered the screen back into place but it was just enough off to give the double image or ghost look.


Here are some fabulous deconstructed screen prints with those sad white blank spots. See the difference when you fill them in? Also with all the white filled in, 4 prints can read as one long piece of fabric.
.


In addition to filling the white spots or areas of resist with dye I also have been very diligent to at least butt and sometimes overlaps screens slightly so that multiple prints read as one piece of fabric like the results from today.
I hope you have enjoyed this tutorial as much as I did creating it. If you have any questions or need a clearer more precise description, please leave a comment.
Beth, this is an excellent tutorial! Very helpful and it's making me want to try out ideas NOW. You put a lot of time into it and I really appreciate it. Thanks!
ReplyDeleteSometimes I even turn the screen four time to cover all the white or use clear print paste on the tip end of a squeegee to drag a bit of color onto the white spots. Of course that is MY goal and may not be yours. I've seen people use decon screen prints with white in very creative ways. Let me know when you've experimented so I can your results. Also (good to know) that the thickened dried dye acts as a resist so I try not to get the dye TOO thick as I prepare the screens.
ReplyDeleteBest of success,
Beth
Thank you so much for your great tutorial. Am looking forward to collecting the necessary equipment in order to do some printing when the weather improves. Its just too cold at present. My only concern is needing to get to 80 degrees to 'cook' it. Not sure I have anywhere that would get to that tempreture. Any other advice? could I just iron it after it is dry perhaps?
ReplyDeleteAnn in freezing Brecon (Wales)
Thank you for this excellent tutorial. It is very clear and has encouraged me to try deconstructed screen printing at home - so far I've only tried it in my textile class.
ReplyDeleteexcellent tutorial...I haven't been brave enough to tackle this process yet!
ReplyDeleteawesome info...thanks so much for taking the time to take and post and explain all these photos!
ReplyDeleteThank you, excellent tutorial! I have already made my first 4 prints and they are now batching in the sauna.
ReplyDeleteThanks for giving it a try. I really love this technique. I made a whole quilt fwith some material and a landscape with another.
DeleteHi there, this is a fantastic process and I really appreciate the detail in your tutorial. It has taken me while to find instructions of this process. I wonder what type of dye do you use? Would procion dyes be suitable?
ReplyDeleteHi there what a wonderful tutorial, I have really struggled to find such detail explanation oft his process. Apologies if you received this message twice, I had to sign up to the website. Do you use procion dyes to make your prints?
ReplyDeleteWhat do you mean they are color catchers that you use in washing machine? Are they a certain fabric or brand? I do soak my fabric in soda ash first and I have wrapped in plastic and cure in sun for 4 hrs. After reading this I just pressed my silk and then washed but lost a ton of color? Do you find that is true ? Do you press long ? How to prevent loss of so much due in rinsing? Yet be real dedicated to set up in your kitchen and take down every time? I use a foam on my tables with a packing sheet between and then drop cloth. 😀
ReplyDeleteHi Barbara. Color Catchers are a product made by Shout and can be found in the laundry section You add one to the wash to collect dye particles and keep them from dyeing ack and making the fabric look muddy. If you are using silk you can use soda ash (one cup of dry powder to one gallon of water) or vinegar (one cup to one gallon) as a pre-soak. Line dry it. After you have dyed the fabric with dye in print paste LET IT DRY completely. If you live in Florida, lay the fabric on the grass and let it dry or on your driveway. When it is bone dry, throw it in the washer with synthropol (not commercial laundry detergent which is made to remove stains) and a color catcher. Write me back and tell me how that works.
Deletepart two. When you set up your screens use ONLY dye and print paste. When you deconstruct do it on pre-treated fabric with print paste then let it dry. Never add soda to the dye.
Delete