05 March 2014

Creativity from this last week

Quite a long time ago I made a crow out of shiny packing tape. I tried to make prints of it and it worked to a degree. I ended up just keep the "original". This is a bookmark I made with plain beige masking tape and covered with black acrylic paint. I waited a while and rubbed the paint off the tape portion.


These were permanent ink pen sketches


This one with colored pencil


And this one with a watercolor wash


This is a sketch of a clay bead I made and fired in the kiln with this partial glaze. I have always like it. I made quite a few beads of heads. I'll show you next week along with the packing tape crow "original".


03 March 2014

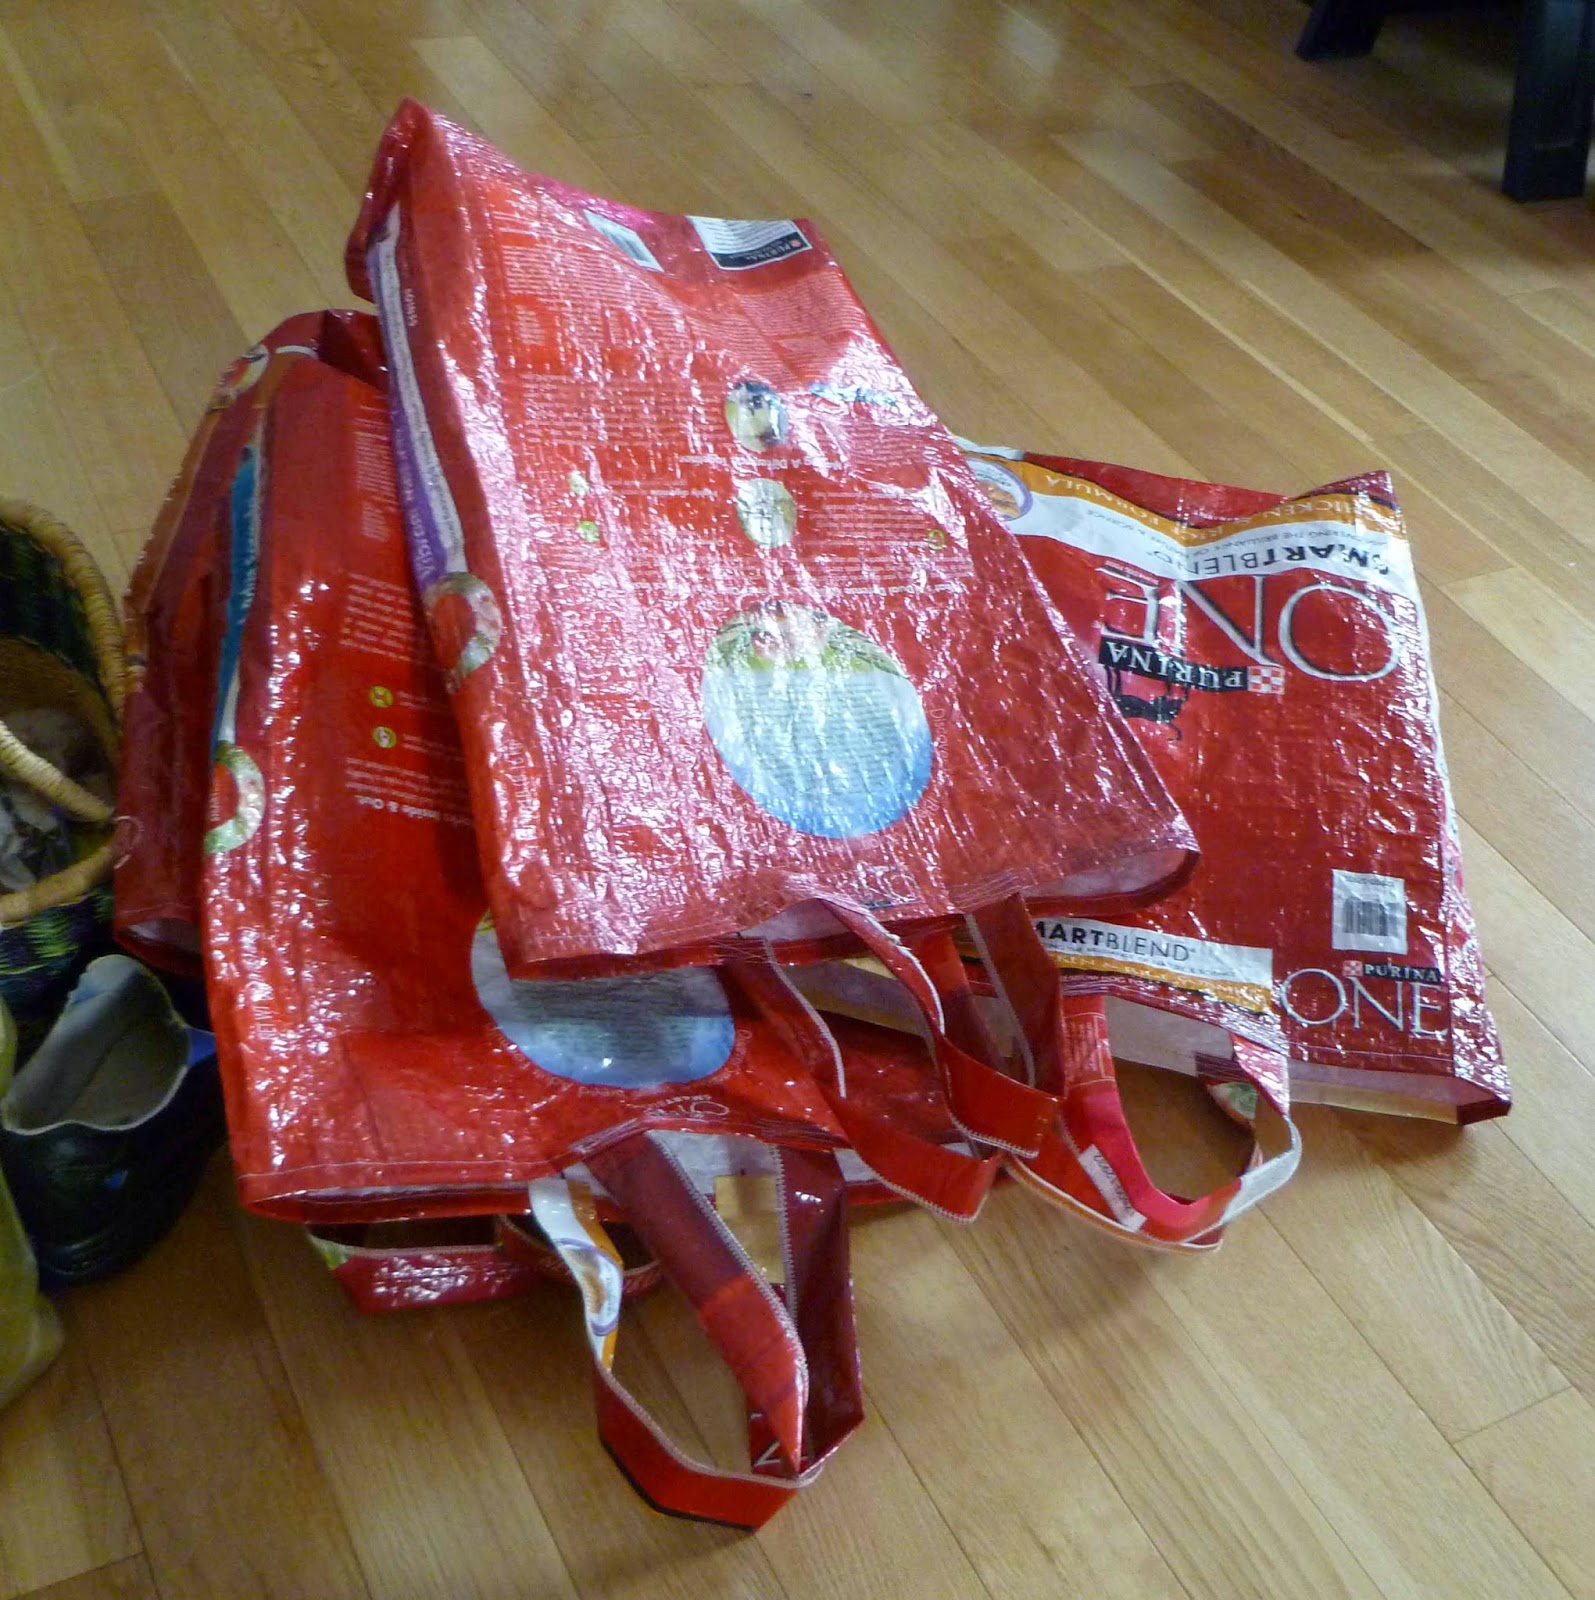
Nylon Dog Food Carrier Bags

My next creative project was making these carrier bags from nylon dog food bags. I not only made these to make them but to get the 11 bags out of my supply area. I made this a three day project to keep it short each day and not so much like work. Long time readers of my blog will certainly remember these on my blog from about 4  years ago.


The first thing was cutting the bottoms off the dog food bags, turning them inside out and washing (I did it in the shower) them thoroughly to get the grease and smell out. If you think dog food smells bad just wait until the grease goes rancid!!   P U !!


Bags grouped in fours. I have serged the bottoms and they are waiting for bottom corners and handles.


I used a sewing ruler to mark up and over 2"


I put my hand inside the bag at the bottom corner and poked out this "point" to stitch to create the "box" bottom.


Bottoms sewn

Turn them right side out for the hem. Now I have to do a double fold and stitch a "hem" at the top edge.


Now to apply the handles


Handles for 4 bags


One side of the handle sewn back and forth with many tacks.


Other side of the handle and you can see the multiple tacks at the top of this picture on the other end of the handle.


Finished bags


Folded


Finished bag all folded up and ready to go. I love giving these to people and they love them for shopping.


28 February 2014

15 Minutes of Creativity a Day

I have a desk with lots of cool creative stuff on it. I had purchased some luggage tags for a project but I couldn't get the results I wanted so they just found a spot on my desk to lay. On the Quilt Show, a pay by the year program I purchase, was a woman who daily made "cloth" from scraps as an exercise in creativity. Well, I do stuff too, not necessarily daily but a few times a week. It may or  may not involve fabric or sewing but I find it fun and creative. I thought it might be nice to share with you and maybe you'd like to do a short, maybe 15 minute bit of creativity too.

Here is my desk. This was a dining room table that I bought when I graduated from college ('71). I just replaced it about 10 years ago and only because I put a candle on it and burned the teak veneer.


There are LOTS of things to spark creativity


Ink, glue, pens (mostly fountain) mat medium, a water bowl for brushes and watercolors.


and stamp pads, luggage tags, white out, metallic threads a felt crow and a Christmas card from Kit Lang!!


Needles, thread. scissors, tape, tweezers,  PVA (both full strength and half watered), more water colors and three containers of brushes - all kinds.


A stamps made from rope. A piece I love that needs "more work", rocks (I love rocks), sea glass from the beach and my sweet grass in braids which I grow every year. There is even a bin of thread balls. I like thread balls and use the in my work.

One of the things I have been doing lately is working with these luggage tags. I bought them for a project but didn't get the results I wanted. I ended up taking 10 and covering both sides with mat medium. The first two I did were with oil pastels and watercolors.

I love the way the oil pastes shed the water colors but leaves small droplets of color on the pastels. Also any voids where the pastels didn't cover the tag are colored by the watercolors. You can really see that on the hot pink circle in the center above.


Next I made Brian a heart out of 2 layers of corrugated cardboard covered in white tissue paper. Then I did a collage of various colored tissue paper I had on hand.


Next time I sat down at the desk I decided to use some of the left over pieces of triangular cut tissue from this project to cover a luggage tag.


In the cup on the right is half PVA and half water which I keep mixed in a bottle. I have had it mixed and in the bottle for years. I painted glue on the tag, laid down about 6 pieces of tissue and painted more glue over it. I wrapped the edges too.


My "drying" apparatus 


I like the way the tissues from the various layers show through altering the values and hues!


I knew about water soluble colored pencils. I have had mine for years but I didn't know about water soluble graphite sketching pencils.


The colored pencils are Cretacolor


but the graphite pencils are Derwent.  These are dark, medium and light.


You can really see how the mat medium which was brushed on altered the application of the graphite pencils. Most of the time I love seeing the effects of the brush marks on the work but in this case the mat medium kept the wet graphite from working WITH the paper. It pooled and I did a lot of re-wetting to try and pick up excess wet graphite. This is what this is all about - learning!


Both colored and graphite water soluble pencils.


The last thing I am working on, I made a three day project to keep it short and not so much like work. A friend of mine saved her nylon dog food bags and I am making shopping bags out of them. Long time readers of my blog will certainly remember these on my blog from about 4  years ago.


Bags grouped in fours, turned inside out and scrubbed in the shower. Dog food smells BAD! I have serged the bottoms and they are waiting for bottom corners and handles.


Handles for 4 bags


Finished bag all folded up and ready to go


Open bag with nice stitched bottoms to standing easily

26 February 2014

After the quilt was finished

I decided the wash the quilt since I had, literally, been dragging it around the room, dropping it on the floor and probably the dogs had walked all over it -  not to mention chalk from the sketched quilt patterns. The fabric had obviously been washed since I dyed the fabric myself. I opted NOT to wash and dry the quilt batting since I like the look when the batting shrinks a bit and the fabric poofs out a bit, giving the designs 3 dimension. Here are a few of the blocks that looked great.


These two were in direct sunlight so they look washed out. You can really see those circles pop up.


This is literally in the middle of the quilt. What a nice sentiment to see when you glance at the bed.


This was at the foot of the bed and over the edge. Reminds me of lovely Hosta leaves.


These are really curly and dimensional


This reminds me of an octopus.

Remember I mentioned washing the quilt in cold water with synthropal and adding two color catchers? That purple could really dull down that dynamic olive green. Here are the color catchers after the wash and dry. So glad I remembered to add them to the wash.


And this is my bed on the first night I slept under it.